Making the Ultimate Manual Camera App for iPhone

An Idea
It was during WWDC 2014 when Apple announced that manual camera controls are coming to iPhone. Until then, focus point and exposure point were user-selectable, but that was it! Manually setting focus point, exposure, or white balance temperature was not at all possible. There have been few camera apps that could emulate these settings using filters but was not the same.
Us as bxb, two app developers who are incredibly passionate about photography, felt as this is our chance - to create a tool that both of us would desire to use every day as a tool. At the moment, we have already gotten our feet wet by developing a few small apps in the App Store. We got together and started putting together the basic idea of a full-featured manual camera app.
Right off the bat, there were few ground rules we both agreed upon. It has to accommodate all the manual camera controls available on iPhone. It should also be available for iPad as well for iPhone, yet not just with a scaled-up iPhone interface. iPhone version should have one-handed operation for all the main controls. Last but not least, it should not use any third-party frameworks.

Alpha mockups
Best Controls
We started looking into how to approach main adjustments. This was something we both were very particular about. We understood that the implementation of this makes or brakes the appeal of the app for us. We were turned off by the common approach to controls - a ‘ruler’ approach, with all the settings scattered across the screen from which we wanted to stay away.
‘Ruler’ approach with settings scattered across the screen
We started hammering away at the primary adjuster implementation. After a whole year and many trials and errors, we came to a final decision by letting the user adjust values by touching the actual content of camera preview and dragging. This seems to be the most natural approach. We had to make sure the adjustments are extremely responsive and have inertia movement when needed. The whole extent of the range has to be visible. The user has to be notified when limits are reached, visually, and also with haptic feedback.
Beta mockup
After being completely satisfied with the result of controls, we continued with the development. Most app development teams may contain ten or more developers, each with their specialty of responsibilities. With just two of us, I was the coder, and my partner was in charge of UI and graphics. As the months and years racked on, we kept getting more motivated, urging to finish our masterpiece. We kept updating our workflow and approach as the iOS versions got updated, new devices got introduced, and new screen sizes became available. Devices with Dual cameras were released, and Depth became a significant aspect of iPhone photography. We made it a priority that all elements of Camera M are up to date.
Focus, Exposure, and White Balance
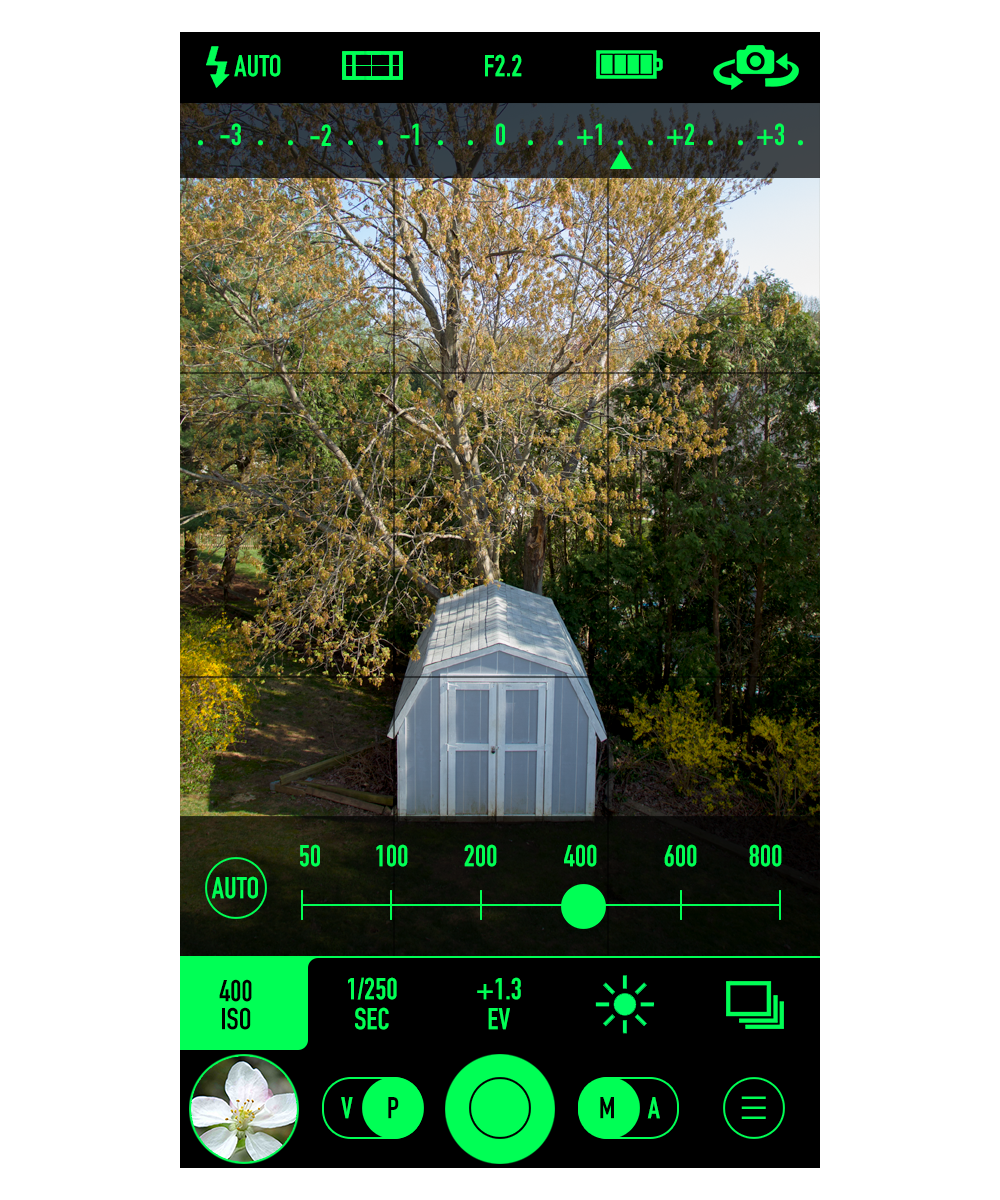
Since there are three main aspects to manual camera controls: focus, exposure, and white balance, we made sure those controls are always closest to the shutter button, at the most accessible places within the control center. We also made sure when adjusting any of these three controls, the interface adheres in a way that all redundant elements are gone, giving priority to the current task, whether it is manually focusing or changing ISO. We learned that there are levels of layers for each task. Just launch the app and snapping a shot being the surface level, tapping to focus, or exposure being next level down. Adjusting the focus point manually or changing the white balance temperature could be the third level down. The fourth and final level is manually adjusting ISO and exposure duration for that granular control. Understanding this fact, let us cater appropriately to each user from beginner to advanced.
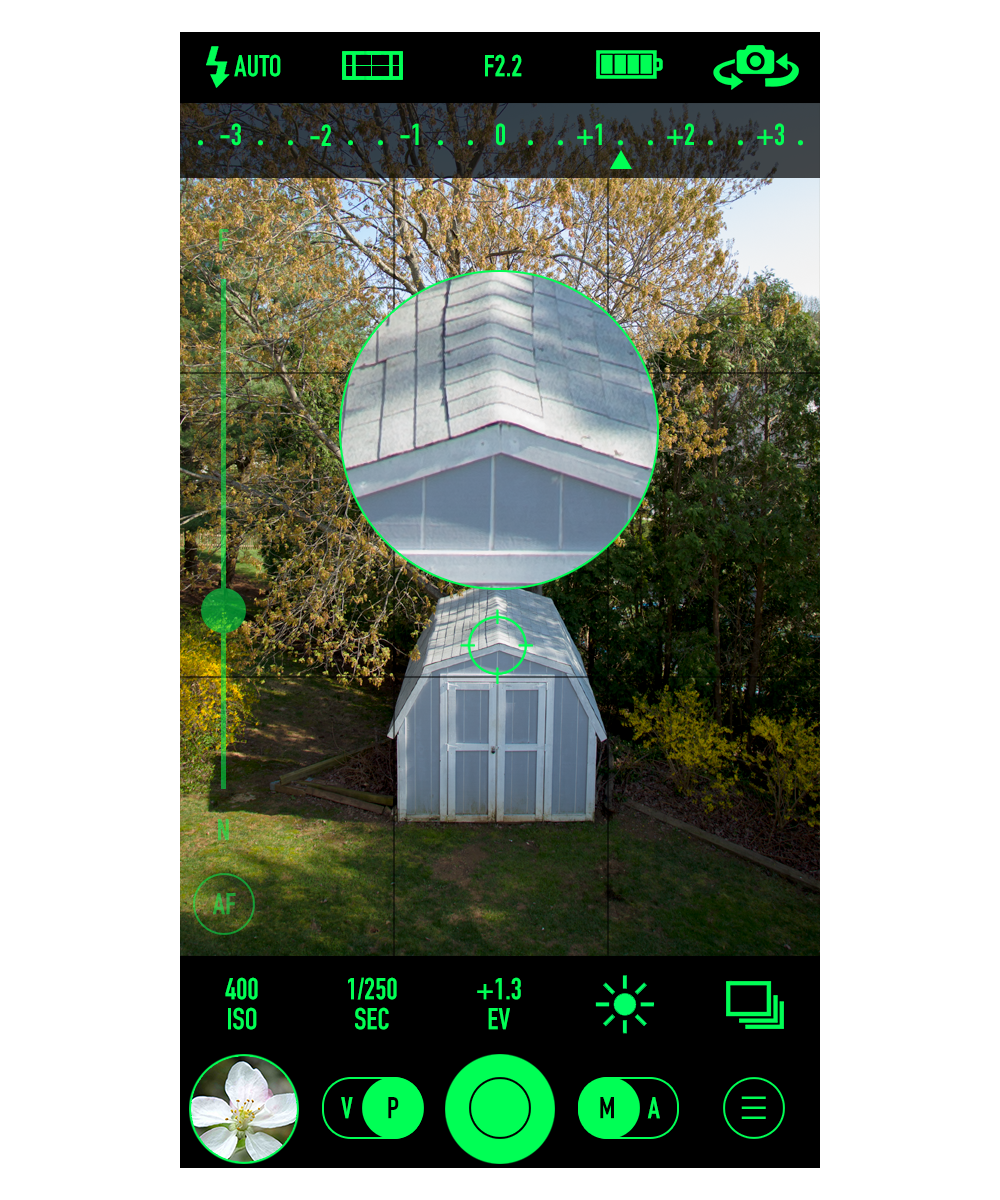
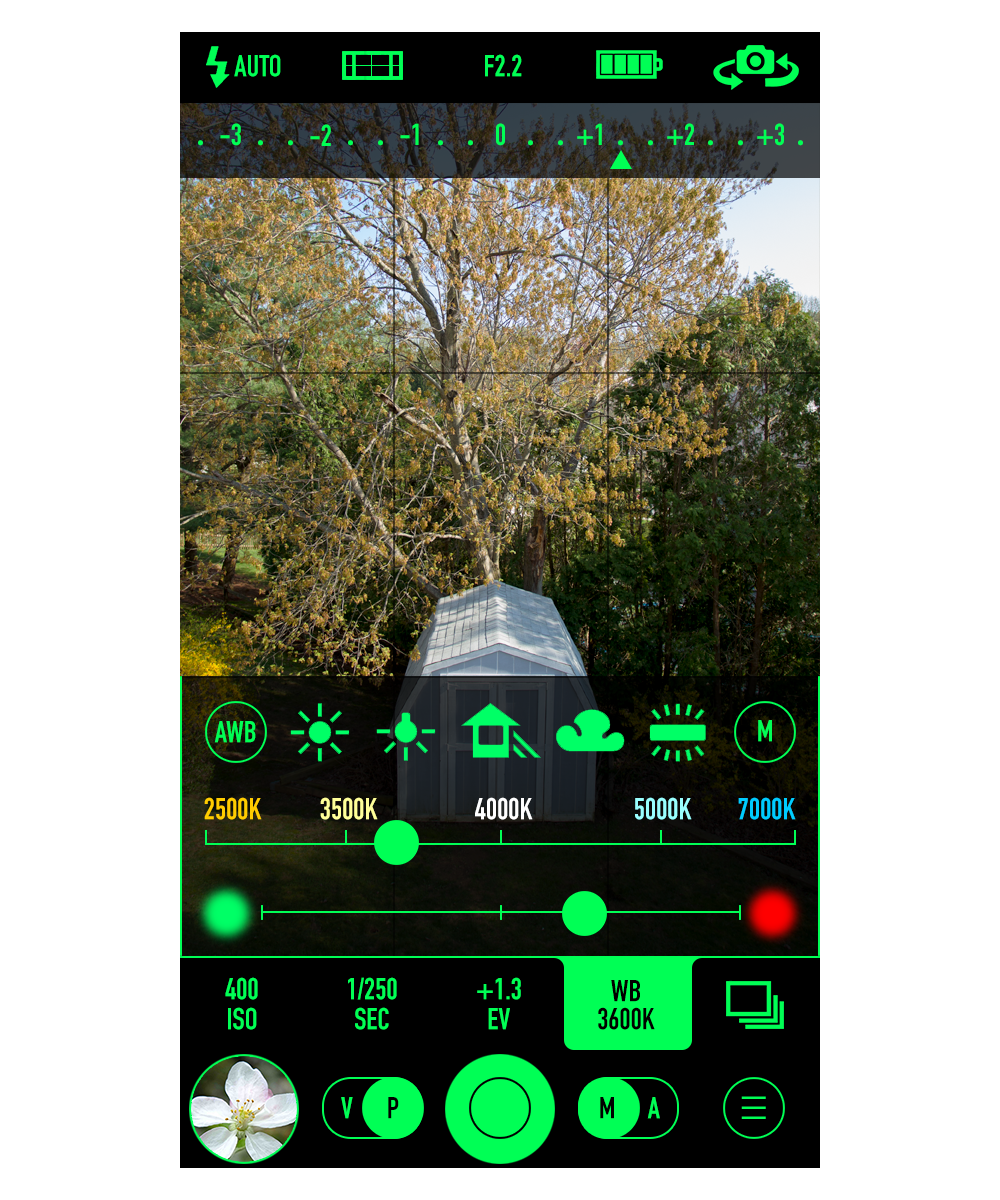
We were also adamant about implementing tools, tools for each branch of manual controls. For focus, we were able to implement a great magnifier that pans with the user’s touch. Focus peaking was a must-have feature. Focus tracking later added as an advance future using AI. For exposure, we took our time with the live histogram. After months of hard work, we were able to come up with a beautiful live RGB histogram that is far ahead of the competition. Highlight and shadow alerts later joined the arsenal. For white balance, RGB histogram and manual gray card mode were added, making Camera M the best camera for accurate white balance.
Camera M Debut
Camera M 1.0
It was the end of 2017, after over three and a half years since we started this journey, we were able to debut Camera M 1.0 for iPhone and iPad at the App Store. By this time, several other manual camera apps on the App Store have begun gaining popularity already. After only a few weeks, in December of 2017, we were featured on the App Store under ‘New Apps We Love.’
Camera M 3.0
Currently, Camera M is on version 3, and we are still committed to making it the best manual camera app for iPhone and iPad. We have gained a great user base that facilitates Camera M in their professional and daily lives. Meanwhile, our two-person team works hard every day, perfecting it!